Free Download- Hello There Handsome, Good Morning Gorgeous
- Oct 21, 2019
- 3 min read
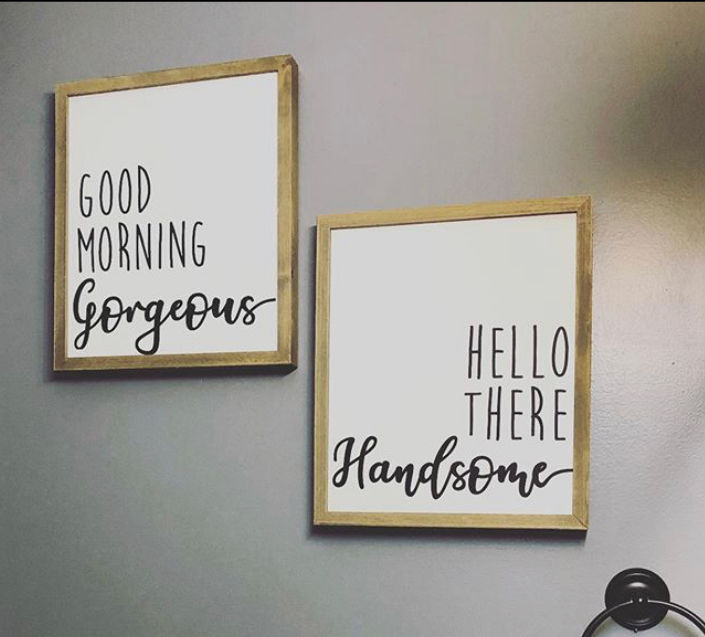
Here is a brief overview and FREE download of how we made our "Good Morning Gorgeous" and "Hello There Handsome" wall signs for our master bathroom revamp!
When it comes to designing signs and other decor for our house, we try and find was that we can make it look professionally done on a modest budget! Our investment in our Cricut was one of the best things we've ever done. We used it to make a lot of our wedding decor, we make a lot of our home decor with is, and Drew even uses it to make stickers and decorate his classroom.
Let's start with the sign. We were at Hobby Lobby one day looking through the clearance section when we came across a sign. The sign was not something we would decorate our house with, but Kirsten was able to look past the piece as a whole and see what we really needed: a blank, wooden "canvas". We found 2 identical pieces and decided we could paint over them with just some white paint and keep the finished wood around the outside. We walked out of Hobby Lobby with those 2 signs for less than $4. Talk about a great deal! Couple that with the fact that we already had some white spray paint at home, we were pretty thrilled!
Now, for the design. Kirsten had a great idea of how she wanted the two sayings to be on the sign and we already had the blank, wooden sign, so we set off to designing the artwork in Adobe Illustrator. We prefer to work in Adobe Illustrator instead of the Cricut Design space because Illustrator has so many more options for creating your artwork. Plus, if you already have fonts installed on your computer (or you find fonts that are free for non-commercial use), then it's just easier to design.

Since we had the wooden signs already painted, we started by measuring the inside of the frame so the artwork could fit and then created an Illustrator document that size. From there, it's just designing it how you want it to look!
After finishing up the design work, we had to prep it for the Cricut Design Space. Cricut doesn't accept Illustrator files (nor do they accept text elements), so we had to turn our file into a Scalable Vector Graphic (.svg). Since it doesn't accept text elements, we had to turn the letters into shapes, unite all the letters together, and then create a "Compound Path". We decided that since this design was 20" by 10", we wanted to cut in 2 paths to make it easier to stick to the sign. After we re-saved the file as an .svg file, we were able to take it over to the Cricut Design Space.

Uploading SVG files to Cricut is extremely easy! We also love that it saves anything that we upload, so we can re-cut a design later if we want to make another. The Design Space has a layers panel to the right where you can see the different cut paths that the machine will take. You can also resize any of the designs here. Unlike pictures, when you resize SVG files, the quality is never lost, so you can make a design 10 inches by 10 inches and resize it to 10 feet by 10 feet and it will still look great!

This particular design we have took a 12"x 24" mat and a regular 12"x 12" mat. From here, we cut our vinyl to size and were ready to cut. We have used a variety of different vinyls, but we are big fans of Oracal 651 vinyl. We find it on Amazon in large or small rolls!
Unfortunately, we didn't take any pictures of our process once we cut and apply to the sign, but look how great these turned out!!
What are some ways that you've added a touch of your personality to your home? Let us know in the comments.
Free Downloadable Files (Artwork will open in new tab; right-click and download file!):
Comments